From the Edit User tab, you can add or remove permissions for any user in the system.
- Open the All Applications menu bar and select User Management to display the User Administration page.
- Select the Edit User tab, use the various drop-down menus and fields to enter search criteria to help locate the user, and click Find User.
- In the Action column click the View/Edit icon (
 ). The user displays in the Edit User window.
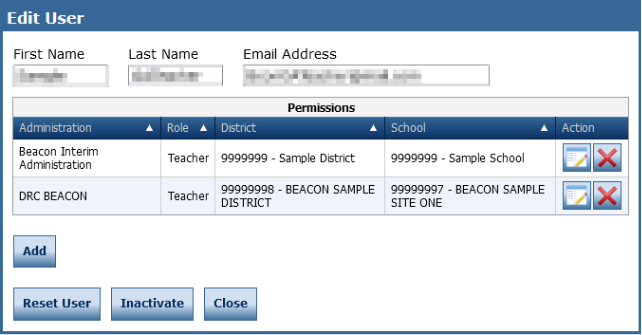
- Select the Permissions tab to display the Permissions dialog box. In the Action column click the View/Edit icon ().
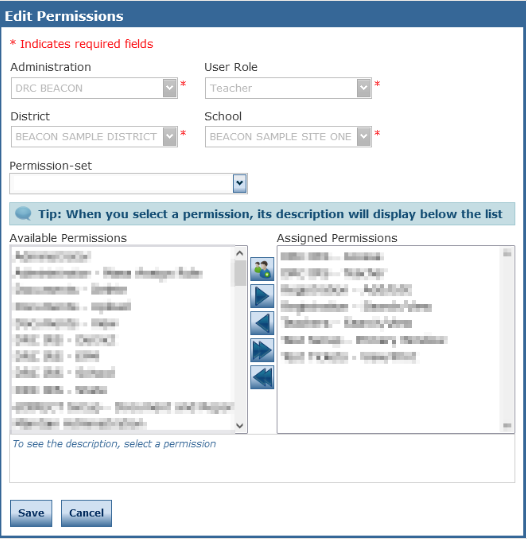
- When the Edit Permissions dialog box displays, select permissions from the Available Permissions list to add to the user, or permissions from the Assigned Permissions list to remove from the user. Use the Add Selected (
 ) or Remove Selected (
 ) arrows to change the permissions, and click Save.
- To select multiple permissions in sequence, hold down the Shift key while you select them.
- To select multiple permissions that are not in sequence, hold down the Ctrl key while you select them.
- Use the Add All (
 ) and Remove All (
 ) arrows to add or remove all permissions.
 - Click the Clone from Another User icon (
 ) to copy another user’s set of permissions.
- Click Save when you are finished to save your changes or Cancel to cancel them.